As I promised in one of previous posts, I’ll write about scheduling MS SQL database to Azure Storage Account.
We’ll start with creating new Storage Account. Go to Azure Portal and click ‘New’. Select ‘Storage’ and ‘Storage account’.
Enter parameters for your Storage account. Enter name, deployment model must be ‘Classic'(as ARM will not be visible from SSMS), select ‘General purpose’, performance can be set either to Standard or Premium. For replication you can set whatever you want (unless you choose Premium storage, then you can’t choose Geo-redundant), encryption also can be set to whatever you want. Select your subscription, resource group and location. Finally, click ‘Create’.
After deployment is finished, go to your Storage account, select Blobs and click add new container.
In new tile, enter name for your container and access type. I recommend you set it to ‘Private’ so no one without access key or certificate can’t Access your data.
After Storage account is set, open SSMS and connect to SQL Server. Go to management, maintenance and select maintenance plan wizard.
Click next.
In this window, select change to create backup schedule.
In job Schedule, set to recurring (and enabled), select frequency of your backup and time you want to be executed at.
Click next.
Select type of backup you want. I will check full. You can choose additional maintenance tasks if you want.
In task order you can choose order that your tasks will execute in. if you only selected backup, just click next.
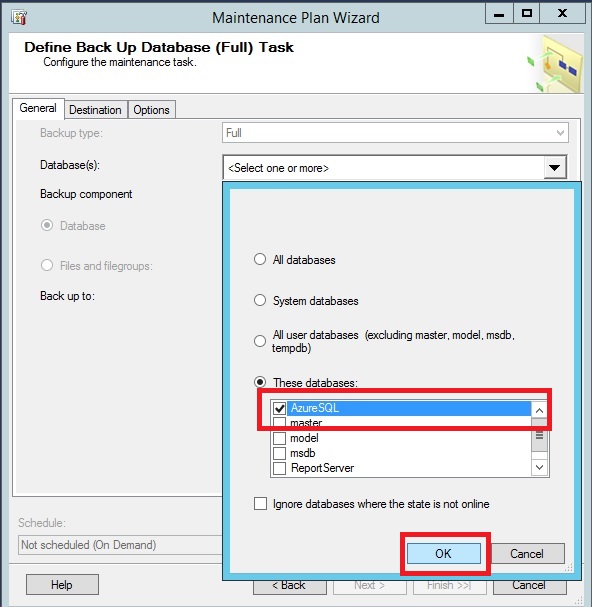
Now select databases that you want to backup.
You can choose different options here, depending on what you want to do. I will set it to single database named AzureSQL.
Set ‘Back up to:’ to URL.
Go to destination. If you already have SQL credentials for Azure backup, it will show in dropdown menu. If you don’t have one, click ‘Create’.
You have few different options here. You can use certificate or publish setting file. If you want to use certificate, use makecert.exe and upload it to your Azure subscription. For publish setting file, you can go to Azure portal and download it or use PowerShell command Get-AzurePublishSettingsFile to do that.
After you download publish settings file, import it.
Now your certificate and subscription will be automatically selected and you need to select Storage account.
Credentials and URL will be generated and you need to enter name of container you created for your backup.
Click next, finish and close. Your backup is scheduled.
Now let’s test our backup plan. Left click on plan you plan and select execute.
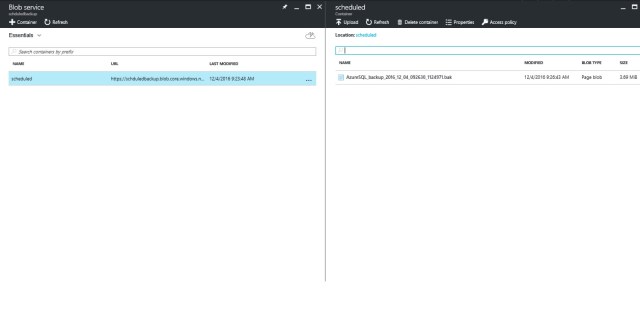
After you get message that it finished, go to Azure portal and your Storage account. After you click on container, you should see your backup.


