I’ve been experimenting and deploying Azure Stack PoC since TP1 was released. Since then, lot of things changed, first with Azure Stack TP2 and later with TP3. Idea of running Azure like environment in my datacenter was amazing to me and I tried to test it right away.
Here are hardware requirements for Azure Stack TP3:

Also make sure that you have Azure AD tenant and not to attach Azure Stack to any of these subnets:
- 192.168.200.0/24
- 192.168.100.0/27
- 192.168.101.0/26
- 192.168.102.0/24
- 192.168.103.0/25
- 192.168.104.0/25
First, I had hardware issues as I had nowhere near hardware that would meet minimum requirements but after joining Authority Partners that has changed luckily for me. Still I tried to push limits and see how low can we go and still do deployment of Azure Stack.
First step would be to download Azure Stack TP3 installation files. You can pick up latest build here:
https://azure.microsoft.com/en-us/overview/azure-stack/try-thank-you/
Extract files and you will get Azure Stack VHD file. Normally this would be used for booting your server but we will use it as base OS drive for our Azure Stack VM.
So create new VM using downloaded VHD as boot disk and assign as much memory and CPU as you can afford.
Now we need to enable nested virtualization:
$VMName = “YourVMName”
Invoke-WebRequest https://raw.githubusercontent.com/Microsoft/Virtualization-Documentation/master/hyperv-tools/Nested/Enable-NestedVm.ps1 -OutFile ~/Enable-NestedVm.ps1
~/Enable-NestedVm.ps1 -VmName $VMName
After that, you will need to attach 4 additional disks to your VM. You can use PowerShell for this:
$DiskCount = 1..4
foreach ($a in $DiskCount)
{
New-VHD -Path C:\Hyper-V\Stack\VHD0$a.vhdx -Fixed -SizeBytes 300GB
Add-VMHardDiskDrive -VMName “YourVMNAme” -Path “C:\Users\Public\Documents\Hyper-V\Virtual hard disks\VHD0$a.vhdx”
}
Boot your VM and make sure that disks you assigned are initialized.
Now run PS script BootstrapAzureStackDeployment that is located in ‘C:\CloudDeployment\Setup’. This will download some additional files needed for deployment.
To make sure our deployment can successfully finish, we need to edit some files.
‘C:\CloudDeployment\Roles\PhysicalMachines\Tests\BareMetal.Tests’ tests some of requirements and we need change some lines to make it work. Locate these lines and edit to match this:
# Validate this is not a virtual machine.
foreach ($physicalMachine in $physicalMachines)
{
It ($BareMetalLocalizedStrings.TestNotVirtualMachine -f @($physicalMachine.ComputerName)) `
{
$physicalMachine.IsVirtualMachine | Should Be $true
}
}
—————————————————————————————————————————
# Validate the number of cores on each of the machines meets the required minimum.
foreach ($physicalMachine in $physicalMachines)
{
It ($BareMetalLocalizedStrings.TestMinimumNumberOfCores -f @($minimumNumberOfCoresPerMachine.ToString(), $physicalMachine.ComputerName)) `
{
($physicalMachine.Processors.NumberOfEnabledCores | Measure-Object -Sum).Sum | Should Not BeLessThan 0
}
}
Now we are ready to start deployment but you can edit some more things.
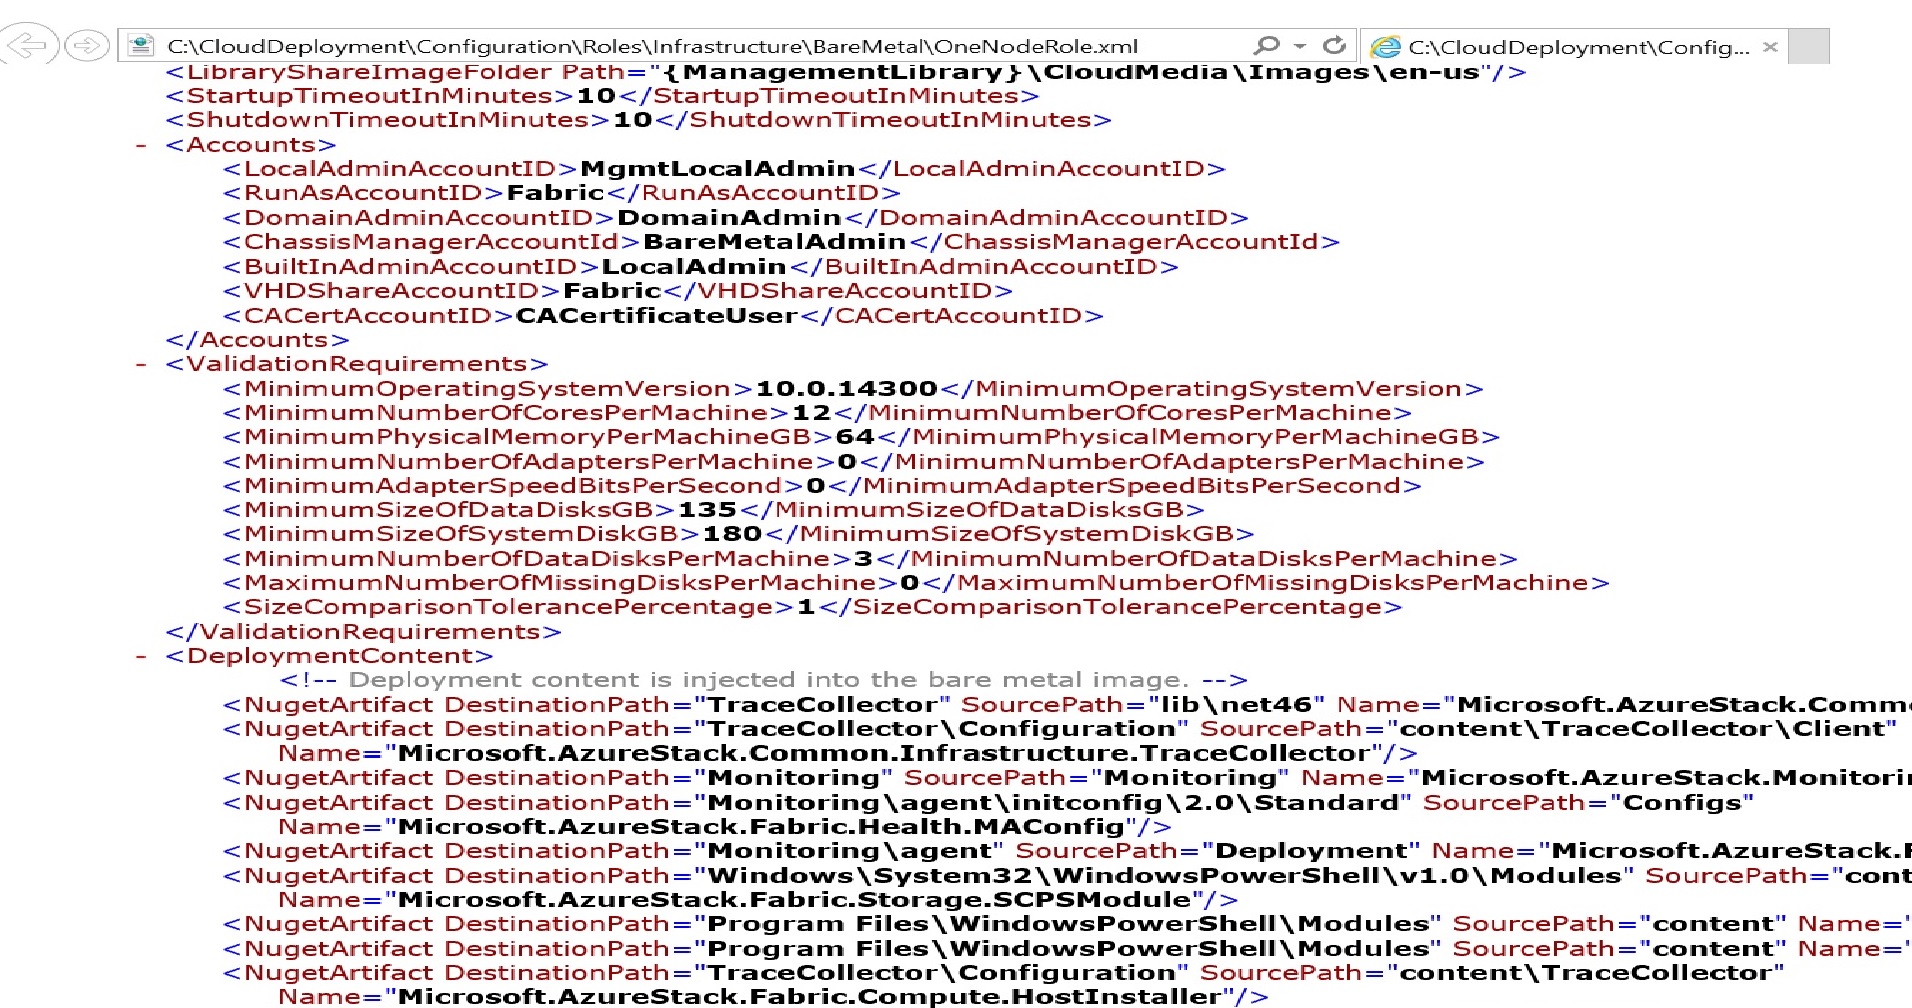
If memory or number of cores you assigned to your VM don’t meet requirements, you can edit file ‘C:\CloudDeployment\Configuration\Roles\Infrastructure\BareMetal\OneNodeRole.xml’.

If you want to play with fabric and edit VMs that Azure Stack uses, you can edit ‘C:\CloudDeployment\Configuration\Roles\Fabric\VirtualMachines\Role.xml’.
Finally, you are ready to make deployment. In case you have DHCP enabled, it is enough to run:
.\InstallAzureStackPOC.ps1
In case you don’t have DHCP, you’ll need to provide Ips for NAT, Gateway and DNS:
.\InstallAzureStackPOC.ps1 -NatIPv4Subnet 10.1.1.0/24 -NatIPv4Address 10.1.1.10 -NatIPv4DefaultGateway 10.1.1.1 -EnvironmentDNS 10.1.1.5
After installation starts, you will need to enter credentials for local admin and AAD admin accounts. Few hours later, if everything goes as planned, you will have Azure Stack deployed in your datacenter.
Now, be aware that this is still PoC and that real thing is coming.
And yes, you can install Azure Stack on VM and even on lower hardware. Do I recommend you do that? Absolutely NOT!
This is only for PoC and to see how it works. If you lower resources too much, you will not be able to do anything with your Azure Stack installation.
Comments are closed.