I did few sessions on Azure Server Management Tools but my friend Romeo Mlinar keeps missing them. So he asked me today when will I do ‘How to’ article on SMT and here we are.
Server Management Tools is great tool that helps you manage your servers remotely in a browser. Almost any browser is supported, if you can open Azure portal, – you’re good. You can manage local servers, VMs and Azure VMs. OS supported is Windows Server 2012, 2012R2 and 2016. I think this will be very popular for running Nano server.
If you travel a lot and need access to your servers this is great. I often had problems with VPNs, closed ports on public or hotel Wi-Fi etc. Not any more, all you need is https and I didn’t run into network where this port is closed.
And best of all, it’s free.
So to set it up, first go to Azure portal and click new. Search for Server Management Tools and select it form list.

Click create and wait for new tile.

Enter server you want to manage (you can enter NetBIOS name, FQDN or IP address and you can enter multiple servers separated with comas). Select your subscription and enter resource group (select existing or create new one). You need to enter name for your gateway and select region. Gateway is server that will be responsible for communication between Azure and servers you want to manage. This server must have access to internet (over https) and to servers you want to manage(winrm).

After deployment is finished, go to your gateway server.

You will get notification that configuration is required. Click on this and wait for new tile.

Generate package link and copy link. Use link to download installation package that you’ll run on your gateway server.

Run package and wait for installation to finish.


After minute or two your gateway status will change.

Now run PowerShell on your gateway server to enable gateway to manage target server over winrm:
| 1 | winrm set winrm/config/client ‘@{TrustedHosts=”server1″}’ |

Now go to server you want to manage.

Click on ‘Manage as’.
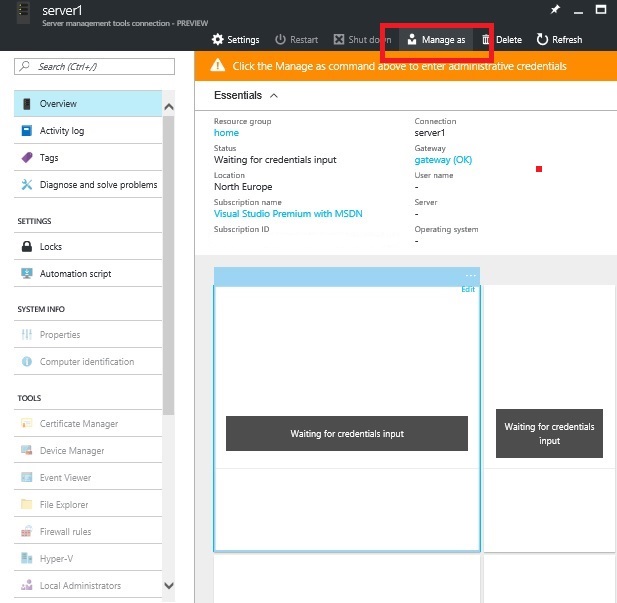
Enter credentials for your server. You can choose to store credentials in Azure or not (for second one you have to enter credentials every time).

Your server is ready to be managed through browser. In overview you have information about CPU, memory, network and disks (disk metrics is not enabled by default).

Now best part is in tools section. Some parts are read only like Certificate Manager, Device Manager, Event Viewer, Roles and Features, Storage and Windows Update.
For other tools you have some control. In File Explorer you can browse your local files and folders. In Firewall Rules you can edit rules, revoke them or add new. In Network Settings you can see your IP address and option to change it to static one. You can stop processes, edit registry or start and stop Services.

Best part is PowerShell window. You get remote PowerShell session to your server from your browser. You can manage your server and have full control over it.

Comments are closed.